I love knitting socks. Not really sure why, but from early on, shortly after I learned to knit, I was fascinated by the three dimensional problem of fitting fabric to feet. I read about how to turn heels, and different ways to shape toes. I read a number of books, with various heel and toe construction methods. I read books about ‘Eastern Style’ knitting where socks are knit from the toe up. I read books about so-called ‘traditional’ sock knitting, where the knitting started at the top of the cuff and worked down the leg, over the heel and arch, then down to the toes.
When I had knit a few items, sweaters, hats and so on, I decided I would try this esoteric mystery and knit socks. I had read through patterns, and thought I understood what was happening. Most of my books at that time started from the cuff and worked down to the toe, so I got out a pattern, cast on what I thought was the right number of stitches for a child’s sock as my kids were then young and it seemed like a good idea to start with fewer stitches to learn about knitting socks, something I considered to be rather advanced.
The cuff went fine, knitting circularly on double pointed needles is at first rather like wrestling with a hedgehog, all sharp points, but I quickly got the hang of holding the work and focusing on just the needle holding the stitches I was working, and the needle I was working the new stitches onto. To this day I use what I learned on that sock when it comes to how I manage the work.
One of the challenges with knitting on multiple needles is to not have extra yarn between the stitch on the new needle and the previous one. This is true whether one is using double pointed needles (dpns), 2 circular needles (2 circs) or Magic Loop (ML). These are all ways to work seamless knitted fabric in the round. Neither of the latter techniques was then used, or at least not as known by me at the time. So I learned on double points.
I learned that while I can knit on a set of 3 double pointed needles, I much prefer to work on a set of 5. With 4, you work from a triangle to a square, which puts more stress on the stitches between the needles. Using a set of 5 you work from a square. After I figured out which I prefer, I refuse to work on a set of 4, and these days if I use double pointed needles I’ll always use a set of 5. If I happen to work on something larger, like a sleeve, and am using double pointed needles, I will sometimes use more than 5, which of course may require 2 sets of needles.
In any case, I learned to manage my work and the double pointed needles, got to the heel and following the instructions put half of the stitches onto a single double pointed needle in order to knit the heel flap then turn the heel. I knit the flap, then started the heel turn. And messed it up. I tinked it back to the start of the row (unknit the stitches, one at a time, back onto the initial needle) and tried it again, and messed it up. Repeat about 4 times. So, I clearly didn’t understand what I was doing!
Got my instructions back out again and stitch by stitch, followed them again. This time it worked! And this time I understood what was happening. I was shaping the ‘cup’ into which the heel would fit. Great fun! It was magic.
Knitting itself is magic already, you take yarn, use a couple of sticks, and pull through loops until you have this fabric. It grows, one stitch at a time, from nothing into cloth. Turning a heel took the fabric and transformed it, so it grew in another direction. Even more magic!
That first heel turn had me hooked. I finished the sock, made the mate. Made another sock, this one for myself, then made the mate. And I realized something about myself at that point. I love the excitement of starting a new project. It’s fun to figure out what I want to make. What yarn shall I use? What color? What type of fiber? What size yarn, fingering, sport, DK, worsted weight? But I also learned that I don’t have that excitement, that incentive motivating me, when I complete one sock then need to start the mate. That’s not so much fun. The initial excitement is gone. And worse, I have to know exactly what I did with the first one, how many stitches did I use? How many rows of ribbing? When/where did I do the heel turn, how long was each section? And since I usually end up knitting while walking around or doing something else, it became an issue for me to keep good records on what I did so I could reproduce it with the mate to the completed sock.
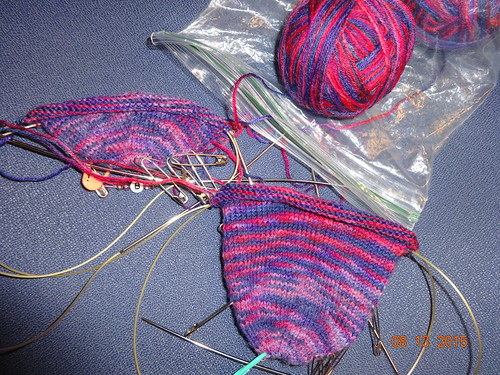
There had to be a better way! And there is. For me the better way is to work on both socks in a pair alternately. I start one, knit a bit, start the other and knit on that a bit more. Alternate back and forth between them. This allows me to stop near or at a point of decision, like how long the ribbing should be, or where the calf shaping starts/stops, alternate to the other sock in the pair until both are at the decision point, do the change on both, then keep going. Eureka! This solved my problem! I kept the new project excitement all the way through, and when I was done, I was done with both, at nearly the same time! And because it kept the new project excitement alive for me, it feels like it doesn’t take any longer to knit 2 socks than it does to knit one. Win-win for me.
So I knit lots of socks. At first I knit from the cuff to the toe. I then read about knitting from the toe up, so I tried that. I tried a number of different toe shaping techniques, and over time a number of heel shapings as well. I found that I liked the process much better when I knit from the toe up. It was easy to try on as I went, to make sure it would fit me right. I also liked that I could knit until I ran out of yarn! When knitting from the cuff down to the toe there is always the risk of not having enough yarn. You have to guess whether you have enough of the yarn to make a cuff as long as you want to make. And if you guess wrong, then you have to figure out what to do. You have to either use another yarn for the toes, or you have to rip the knitting back, make the cuff shorter, then redo the heel and foot, again hoping you have enough to finish.
This made me very unhappy. I knit for pleasure, I love the process, the soothing rhythm of making the fabric. I don’t want the stress of having to hope I have enough yarn, nor the frustration of having to rip back and rework when I run out too soon. So I found myself focusing more and more on toe-up socks.
Several years ago I started to try a number of different techniques for making socks, looking for a process, a set of guidelines, a general recipe, for making myself socks out of any yarn. I already knew I wanted to knit them toe up, so I read about different techniques, different patterns, using that method. One of the books I got was Socks Soar on Two Circular Needles by Cat Bordhi. She had found a technique knitting socks on 2 circular needles instead of double pointed needles. The use of 2 circular needles, which are essentially double pointed needle tips attached by a flexible cable, gave her a freedom to try socks on much easier than on regular double pointed needles. Later she published New Pathways for Sock Knitters: Book One. Her patterns were groundbreaking, and I loved knitting them. There was magical shaping built into the socks based on math principles. Loved that! And the shapings were beautiful and intriguing.
Here is a sock with the Riverbed construction:

Here is a sock with the Sweet Tomato Heel:

The switch from double points to using 2 (or more) circular needles was as immediate as I could afford to buy the needles I would need to do it. 2 circulars gave me more flexibility and control. I continued to knit socks, but now I was trying different toe and heel shaping techniques. I tried Cat Bordhi’s Sweet Tomato Heel, published in her ebook. I tried various relatively standard short row techniques, I tried the Fleegle’s Heel published in Fleegle’s Toe Up Socks. All worked, and made nice enough socks.
Here’s an example of a Fleegle Heel:

From these various books and other information available I cast on using Judy’s Magic Cast On. There are various videos of this technique available also. Works great, lets me decide how many stitches I want to cast on, seamlessly, for a nice toe. I generally use 8 stitches, 4 on each of the 2 circular needles. I then knit one round, then I increase in every stitch, starting an 8-pointed star toe. I continue to increase into those 8 initial stitches every other round until there are 16 stitches on each needle, then I increase every third round, so 2 rounds plain between increases. I continue the increases until there are enough stitches. How many that is depends on the yarn and needle size used.

Then I tried the Fish Lips Kiss Heel. Yes, that’s right, Fish Lips Kiss! Otherwise shortened to FLK heel. This is a fantastic recipe. It’s a general principle recipe, not a ‘pattern’ as such. It gives you a general recipe to create a template that can be used to determine when to start or end the heel and toe in a sock. The template is used as the sock is being knit to try on the sock, even if the intended recipient isn’t available. As long as you have the template, you can make socks to fit. And the instructions have a wonderful way to turn short rows.
The author, known as Sox Therapist, has done extensive research on socks, how to construct and fit them. And has all that wisdom available to anyone for just $1.00! Well worth the very low price. And the pattern gives instructions on construction for both toe-up and cuff-down socks. So anyone can use it with their preferred technique and make great socks.
I liked this technique, and I like that I can ‘try on’ the sock using the template and know that the heel will be properly placed to fit me when I’m done with the knitting. I can ‘try it on’ when I’m in a meeting, without taking off socks and shoes to do it! Not something I’ll do in a meeting, unless it is with other sock knitters, of course.
Here is an example of the FLK Heel:

So now I have most of my ‘recipe’, my preferred techniques for toe and heel, short row method. The instructions on how to do the short rows in FLK are easy to do, fast and simple once you know them. No more wrap and turn (w&t) for me! And with this heel there is no need for a gusset or heel flap of any sort, either.
Now I had to resolve another challenge. How to do calf shaping on long socks. Because I love long socks. I want my socks to come up to my knees. Not stop part way up the calf so they fall down. Not just slightly above the calf, those fall down, too! I want a sock that comes up to the knee and stays there. Tall order, no pun intended.
I tried several options, including these, but wasn’t completely happy with the results.


I even made myself a pair of old-fashioned garters, a very traditional way to hold up long socks.

So I needed to find a good ribbing that has good recovery, and I need to be able to do whatever will make a sock fit well around a calf, but still keep sock up above it.
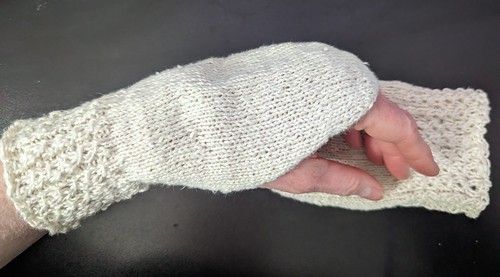
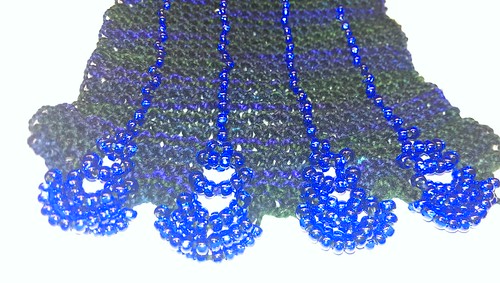
One day I happened to be reading through one of the Ravelry forums on a thread about keeping stockings/long socks from falling down. One of the posts gave instructions for her ‘Ma’s Favourite Ribbing‘. So I tried it on the next pair of socks I made, and loved it! I can see why her Ma used it on most of her socks. It just works. It has good stretch, but also the best recovery I’ve found in any ribbing. So now it is my ‘Favourite Ribbing’ also, and I use it extensively where I need a ribbing with good recovery. It also happens to be very pretty and looks very different when done in fine gauge yarn than in bulkier yarns.
I continued to make socks, now using that ribbing, trying different calf shaping techniques. I was also during all of this concerned with durability. It takes time to knit socks by hand. So I want them to last as long as possible. Most socks are knit with fingering yarn, which is suggested to be knit on needles of size 2-3 mm (US 0 to 2.5). However, my reading had some references indicating that smaller needles, a denser fabric, would last longer. This made sense to me. Pressure from being walked on will spread out stitches, especially if the fabric is not very dense. So I started to knit my socks on smaller needles. And I found that I much preferred the fabric of the denser, tighter knit socks. I now knit my fingering weight yarn socks on 1.75 mm needles (US 00’s). I would probably actually prefer them knit denser, but I haven’t yet tried knitting socks on 1.5 mm needles (US 000’s)! For DK yarn I use 3.0 mm (US 2.5) for the foot.
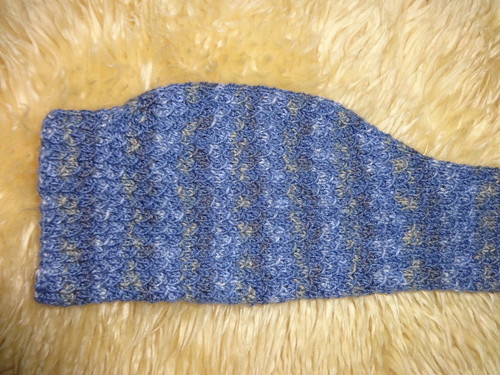
As I was not satisfied with the results I was getting by increasing the number of stitches to shape the calf, I decided to try changing the gauge of the fabric by changing needle size. I first combined this technique with all-over-leg ribbing and this was much more successful.
In the above photo it is possible to see where I changed needle size by where in the leg ribbing the color pooling changes. If you look carefully you can see that after the calf shaping is done I go back down to smaller sized needles. These are knit in DK weight yarn. I love DK yarn for heavier, warmer socks, and because there are fewer stitches, they take less time to knit.
This technique worked very nicely, but I would have preferred the socks to be slightly longer. Ribbing eats up a lot of yarn. Each of my knee socks was using a full ball of yarn. I didn’t need much more length for the socks to be plenty long enough, but if I continued to use ribbing I wasn’t going to get it unless the yarn balls came bigger/longer. I also decided that for sleeping socks, all over leg ribbing isn’t as comfortable. It’s fine for all day wear, but not so much for sleeping.
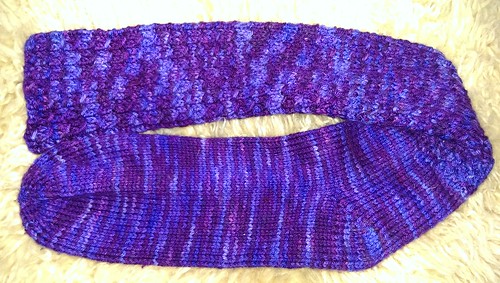
The obvious answer to leg length of the socks was to not do all over ribbing. Stockinette uses less yarn than ribbing, so I tried that. And that was very successful. I tested again using DK yarn.

This was also a full ball of yarn, and there is enough length that the cuff can be folded over some, which helps make them even more secure staying up. The needle size calf shaping again changes the color pooling, and helps the fabric to shape itself to the leg securely. These socks stay up.
Now I have my full recipe, simple 8-star toe, FLK Heel, much smaller needles than usual for the yarn, shape the calf with gauge change by increasing needle size. I made another pair of DK weight socks to confirm. Don’t have a photo of them on, but they fit very well also, so now I’m trying the recipe with fingering yarn. I’m most of the way done, well into the ribbing. I’m very much looking forward to completing and wearing the fingering version of My Favourite Socks!