Tags
I love linen hankies. At first they are a bit crisp, but with use they become very soft, with a smooth subtle sheen. I prefer cloth hankies to using kleenex, so I have and use a lot of hankies, both cotton and linen. A few years ago I looked at my hankies and realized most of them needed to be replaced. Some due to staining some due to the fabric disintegrating. Cotton especially will simply fall apart after a while.
Some of my favorites were some small, women’s sized linen hankies that I had purchased years before. When I tried to find more they just weren’t available. I could find some linen men’s hankies but they were incredibly expensive. So I decided to make my own. I purchased 2 yards of white handkerchief linen fabric for less than it would have cost to purchase 2 men’s linen handkerchiefs.
I always wash fabric before I make anything with it, so I serged the cut edges of the fabric then washed and dried it twice to remove any sizing. Then using the pulled thread method I trued (squared) the cut edges of the fabric. The fabric was about 53 inches wide before washing. I didn’t measure it after washing, but I expect there was the usual amount of shrinkage.
Not wanting to waste any fabric I decided to use the full width of the fabric and make as many hankies as would fit across evenly. I measured off 5 equal width hankies across the fabric, deep enough to make them essentially square, about 10″ x 10″. I made 10 of these. But they were pretty big, larger than I need, larger than fits easily in my pocket.
So the next set was 6 across. These were about 8.5 x 8.5 inches, a much nicer width for my needs. Plus it would give me more hankies for the same amount of fabric as the 10×10’s.
All of these I used pulled threads to be sure that I was perfectly with the grain, that they were perfectly square. The first of the hankies that I hemmed I kept the edges square. I prefer to use a rolled hem. After the first one I decided it would be faster and easier for me if the corners were rounded instead of square, so all the rest have been rounded. To round the corners I fold the hankie blank in half then quarter, being very careful to keep the edges and corner points together. Once it is folded into quarters, all 4 corners together, I cut off the corner into a gentle curve.
The rolled hem is a lovely way to hem linen as it completely encases the cut edge of the fabric. With fabric this fine I can do a very narrow hem that is very stable.
A very nice thing about linen is that I can finger press the fold to make this hem. Just a bit of careful folding then press the fold between my finger and thumb to crease it. My sewing books say to use a sharp needle when working linen. For this hem I much prefer a blunt, rounded needle, as it will move easily between threads, not pierce and split them.
There are plenty of resources on how to do a rolled hem, but here are some photos of what I do. I start in the middle of a straight section, take a tiny stitch to anchor the thread then start the alternating tiny stitches between the folded edge and down into the fabric far enough from the edge to make the rolled hem. The left has been hemmed, the right not yet done.

Here are some photos of a section already in progress, where I have the needle through the folded edge.


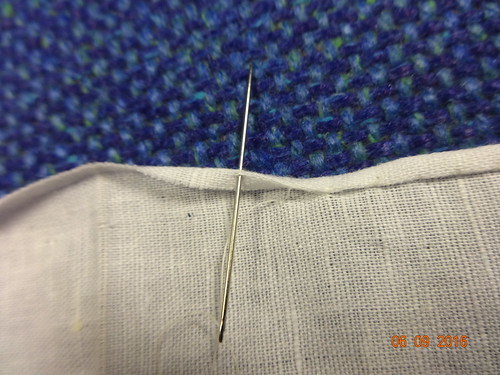
Here are photos of the alternating stitches.


After I have 3 or 4 of these paired stitches it’s time to pull the thread to tighten and roll the hem. I will help it to fold over, flattening it as the thread is tightened. Sorry that there is blurring, it isn’t easy in relatively poor lighting to get clear photos of something this small.

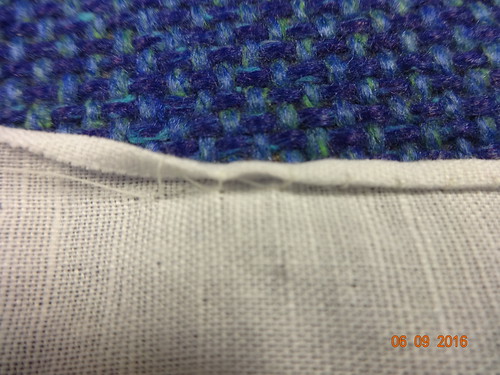

As might show up in the photos, I take the stitches through 2 or 3 threads at a time. I use the same technique and number of threads regardless of the weight of the fabric. The scope just changes, the distance that the fabric must first be folded, then that distance again as the line along which to take the body stitches.
That 2 yards of fabric gave me a lovely stack of new hankies. At the very end of the fabric I ended up changing from 6 to 8 across the width of the fabric, making 2 courses of that instead of one of 6 across and having extra fabric left over. The 8 across are only about 6.5 inches across, and slightly less deep. They are not quite square, but they let me use all of the fabric. I do like the small size as well. They fit well in smaller pockets.
